Roles Management
Roles are a set of permissions defined by the admin and mapped to users for managing their activities within the project. In addition to the predefined system roles (Project Administrator and Document Administrator), User can add custom roles by providing specific permissions, and further assigning this role to the users. We can create roles using two different methods.
|
Permission |
Actions |
|
Permission Management |
|
|
View |
|
|
Create and Edit Teams |
|
|
Edit existing Teams |
|
|
Delete Teams |
|
|
Archive Teams |
|
|
Assign/Remove Users from Roles |
|
|
Assign Companies to Project |
|
|
Model Management |
|
|
View |
|
|
Create User based Views |
|
|
Delete Models |
|
|
View Iterations |
|
|
Model Transformation |
|
|
Create Custom Property |
|
|
Publish Model from Revit |
|
|
Publish Model from SolidWorks |
|
|
Publish Model from Rhino |
|
|
Publish Model from Tekla |
|
|
Publish Model from SketchUp |
|
|
Publish Model from Inventor |
|
|
Publish Model from Plant 3D |
|
|
Issue Management |
|
|
View |
|
|
Create |
|
|
Edit |
|
|
Delete |
|
|
Status Transition |
|
|
RFI Management |
|
|
View |
|
|
Create |
|
|
Edit |
|
|
Delete |
|
|
Status Transition |
|
|
Transform RFI as Issue |
|
|
Document Management |
|
|
View |
|
|
Create Folder |
|
|
Upload Files |
|
|
Delete |
|
|
Download |
|
|
Administer Document |
|
|
Status Transition |
|
|
Drawing Management |
|
|
View |
|
|
Upload |
|
|
Delete |
|
|
Download |
|
|
Asset Management |
|
|
View |
|
|
Edit |
|
|
Publish |
|
|
Imports from Global Content |
|
|
Model Coordination |
|
|
View Clashes |
|
|
Status Transition |
|
|
Publish Clash from Navisworks |
|
|
Run Clashes |
|
|
Create Coordination Set |
|
|
Edit Coordination Set |
|
|
Delete Coordination Set |
|
Role Permission for Project Role
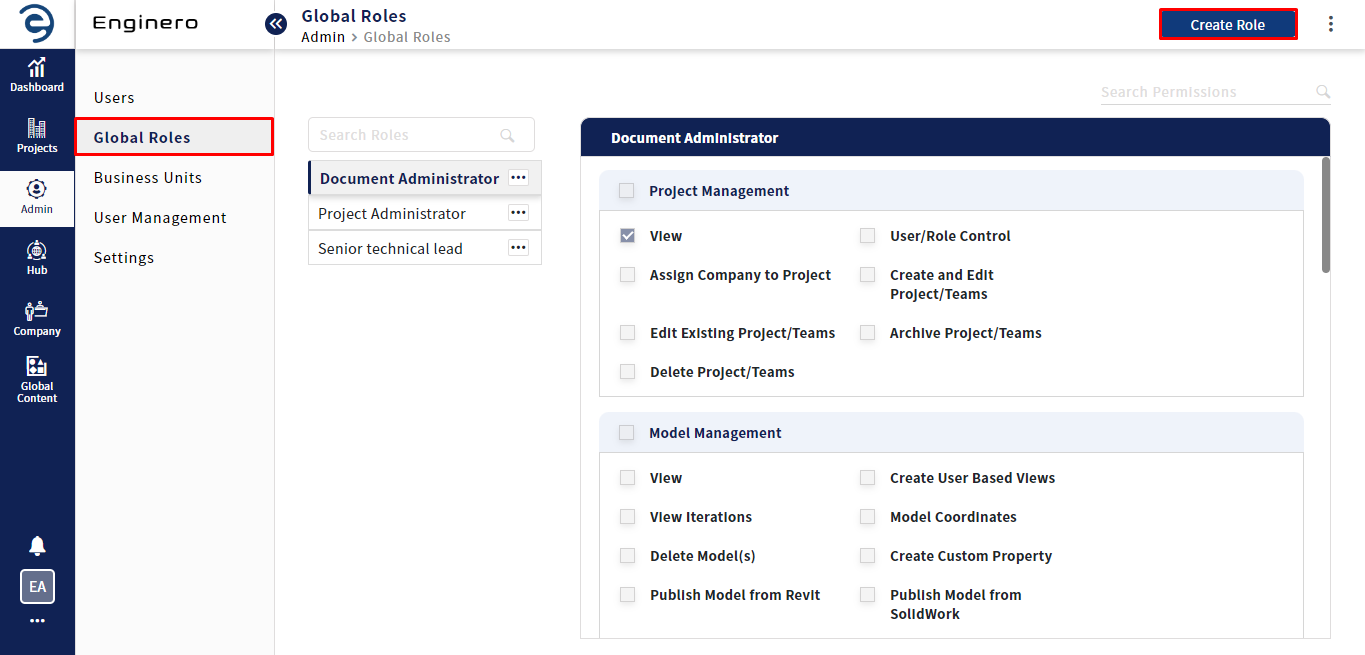
Creating Roles using Admin Module
By default, the application will have a set of roles. Users can either duplicate those roles or create new roles. Follow the below steps to create a role,
- Select Admin > Global Roles module and click on the Create Role button (on Top Right)
Creating Roles using Admin Module
- Enter the Role Name and enable the permission for this role. After providing the details, click on the Create Role button to complete the process
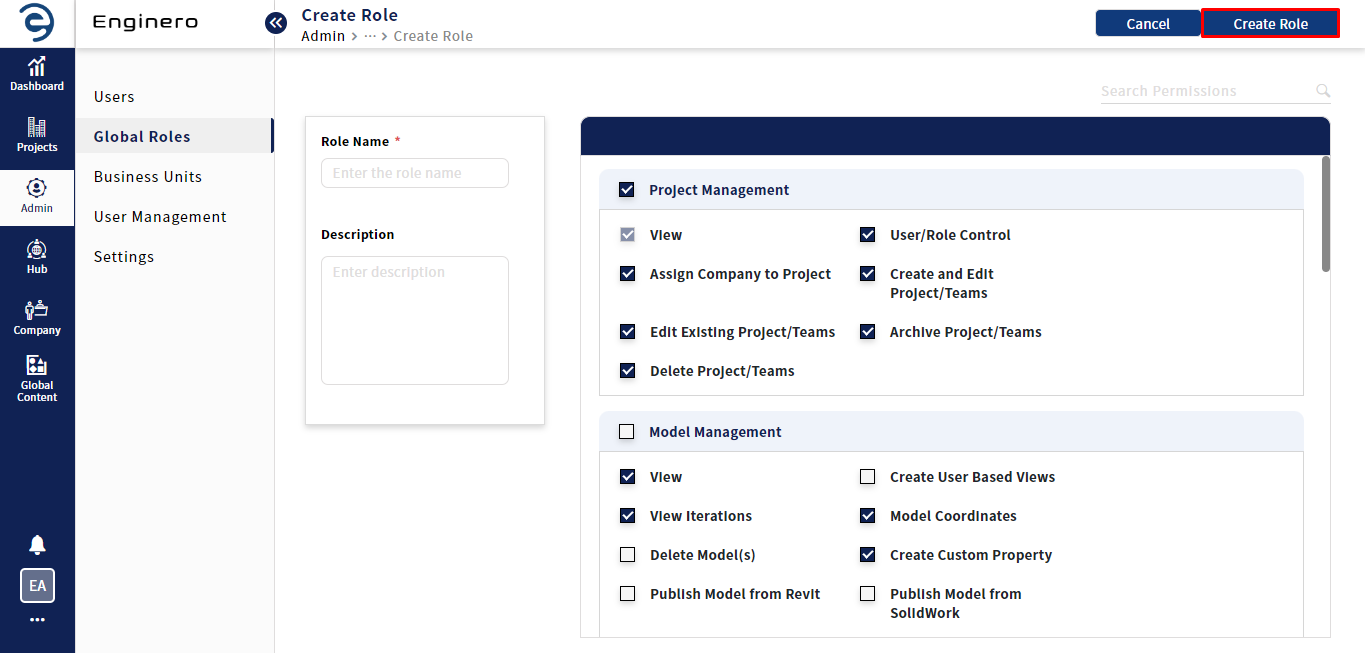
Creating Roles using Admin Module (Cont.)
Creating Roles using Hub Module
All roles defined in the Global roles can be used in the Hub. Follow the below steps to create a role,
- Select Hub from the side Navigation and choose the desired Hub from the listed Hub
![]()
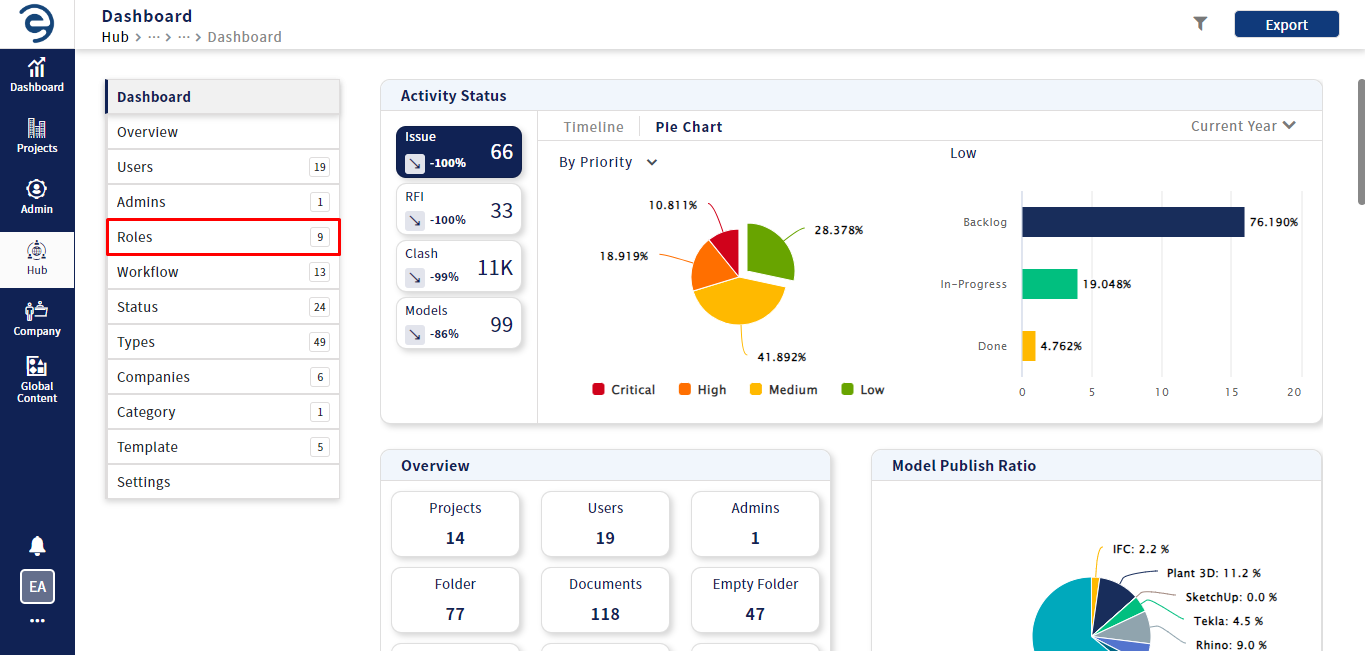
Creating Roles using Hub Module
- Select the Roles option and click on the Create Role button (on Top Right)
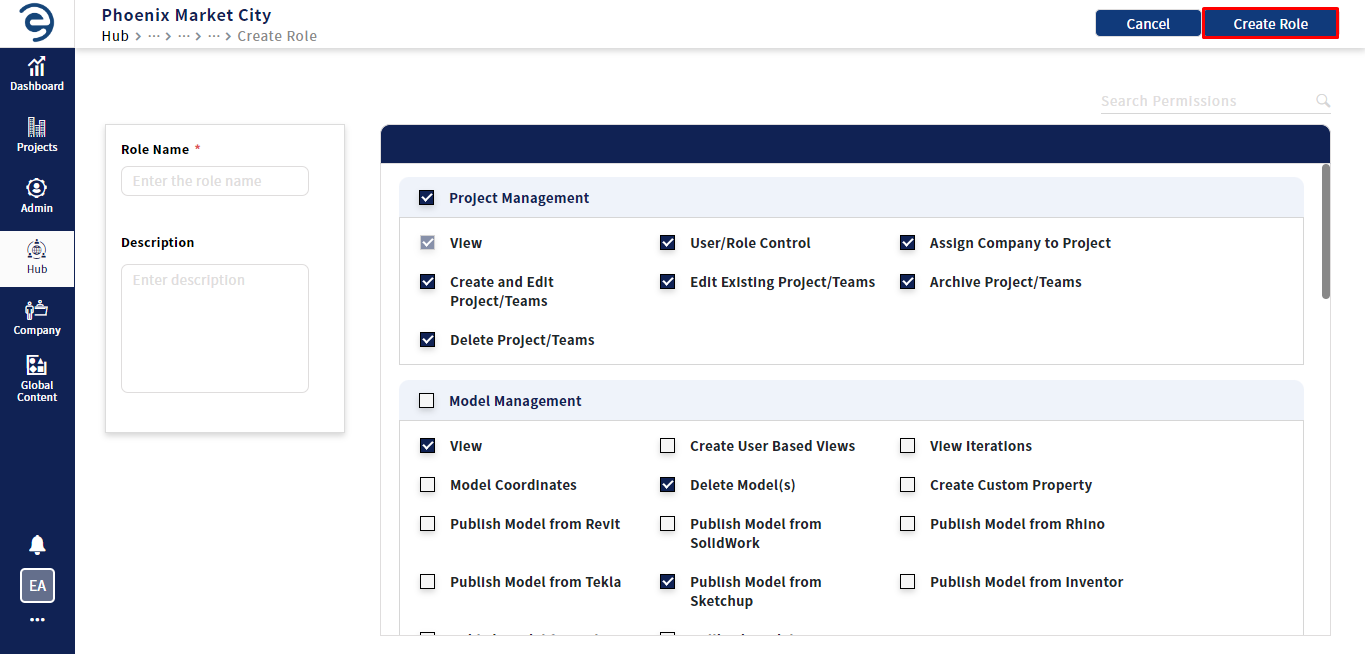
Creating Roles using Hub Module (Cont.)
- Enter the Role Name and enable the permission for this role. After providing the details, click on the Create Role button to complete the process
Creating Roles using Hub Module (Cont.)
Notes:
- The roles created in the Site will get carried over to all the available Hub whereas roles created within an Hub cannot be duplicated within the Site. The Hub Admin cannot edit the roles defined in the Site.
Created with the Personal Edition of HelpNDoc: Maximize Your Documentation Capabilities with a Help Authoring Tool