Manage Properties
The Manage Properties option allows users to view the properties related information for the selected element in Revit, which are shown as per Revit groups. Users can also create and manage custom properties within the custom group from this option. Now follow the step below to access, create and manage custom properties for selected elements
- Select an element from the active Revit model and click the Manage Properties option under the Enginero tab from ribbon panel

Manage properties
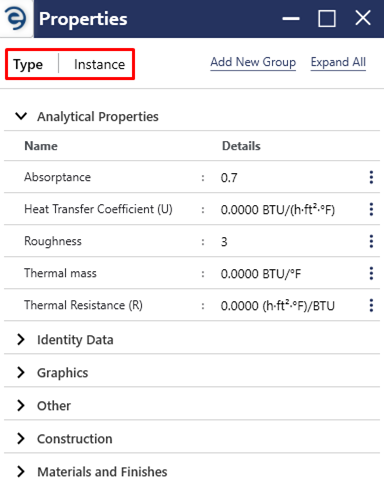
- Displays property-related information about the select element, allowing users to switch to either the Type or Instance property
Manage properties (Cont.)
- In order to create custom properties, users should create the custom group by clicking the Add New Group button from either Type or Instance property window

Manage properties (Cont.)
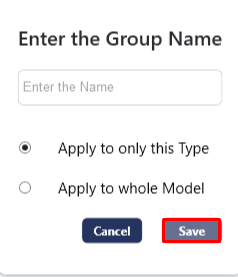
- Enter the Group name and specify whether this group is intended for a particular type or for the entire model by selecting a respective option
Manage properties (Cont.)
- User will receive a pop-up notification once the group has been created. Click the OK to proceed

Manage properties (Cont.)
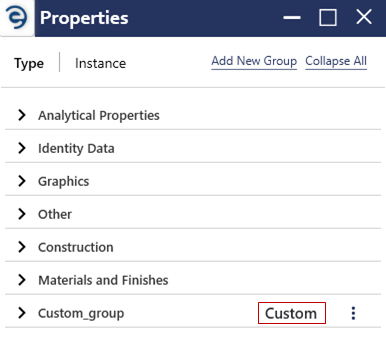
- A custom group will be created with a tag named "Custom" for easy identification
Manage properties (Cont.)
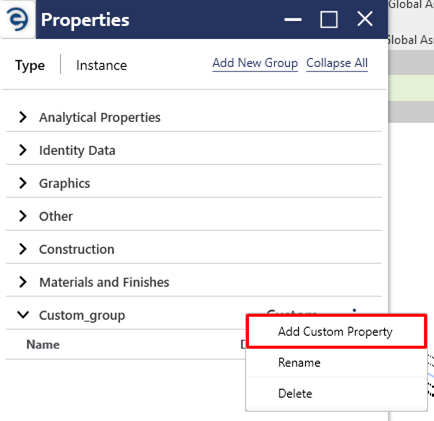
- Click the Ellipsis icon from the respective custom group and select the Add Custom Property option to create a custom property
Manage properties (Cont.)
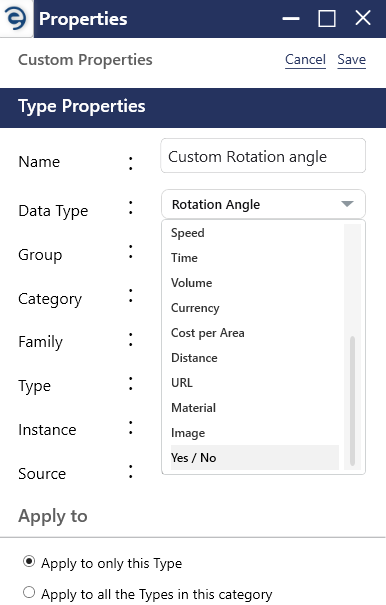
- Enter the desired name, data type, and specify whether the property is intended for a particular type or for all the types in the respective category
Manage properties (Cont.)
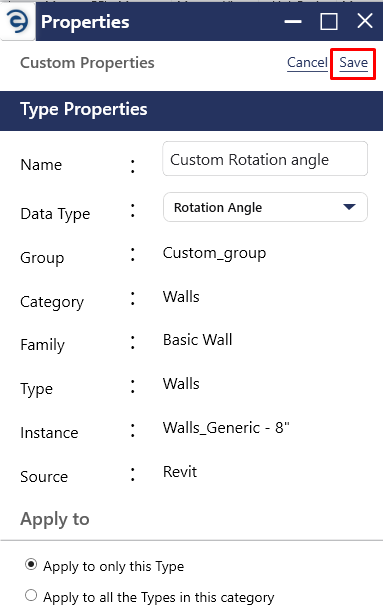
- Once the required information is provided, click on the save button to complete the property creation.
Manage properties (Cont.)
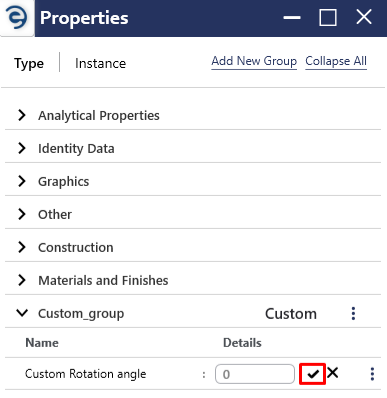
- To enter the value for the custom property, select the Edit icon from the respective custom property, enter the value and click the tick mark to complete
Manage properties (Cont.)
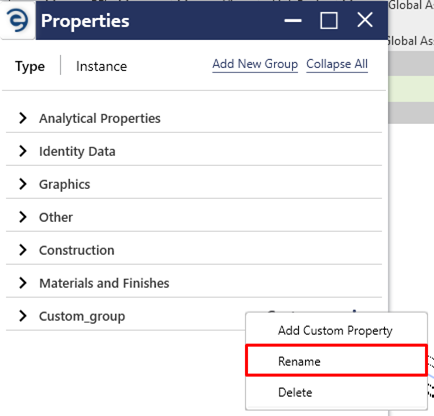
- To rename the custom group, Click the Ellipsis icon from the respective custom group and select the Rename option to enter the desired name
Manage properties (Cont.)
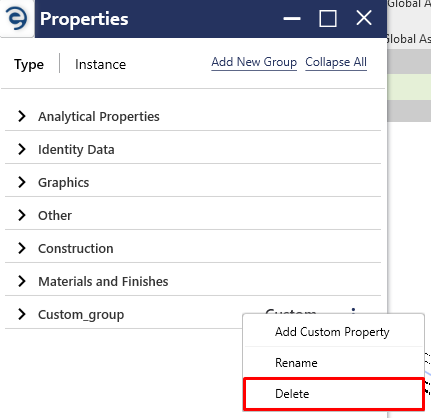
- To delete the created custom group, Click the Ellipsis icon from the respective custom group and select the Delete option
Manage properties (Cont.)
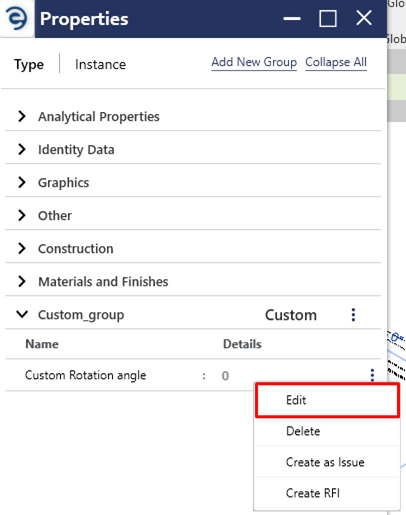
- To edit the custom property, Click the Ellipsis icon from the respective custom property and select the Edit option
Manage properties (Cont.)
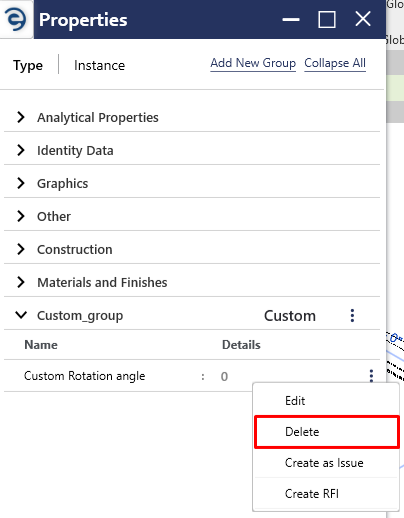
- To delete the custom property, Click the Ellipsis icon from the respective custom property and select the Delete option
Manage properties (Cont.)
Notes:
- Custom properties can be created in both Type and Instance property
- When custom group is deleted, all the associated custom properties will also be deleted
Created with the Personal Edition of HelpNDoc: Say Goodbye to Documentation Headaches with a Help Authoring Tool